
Tutorial for Shopify: A step-by-step guide to establish your online store
In this Shopify tutorial, we’ll guide you through the steps to becoming the proud owner of an online store.
Step 1: Register an account with Shopify
To begin, visit Shopify and enroll in the 14-day trial.
Upon commencing your trial, you’ll need to provide personal details.
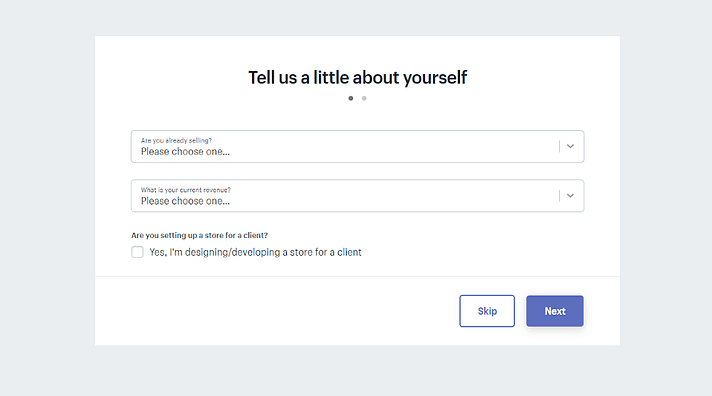
…and more details:
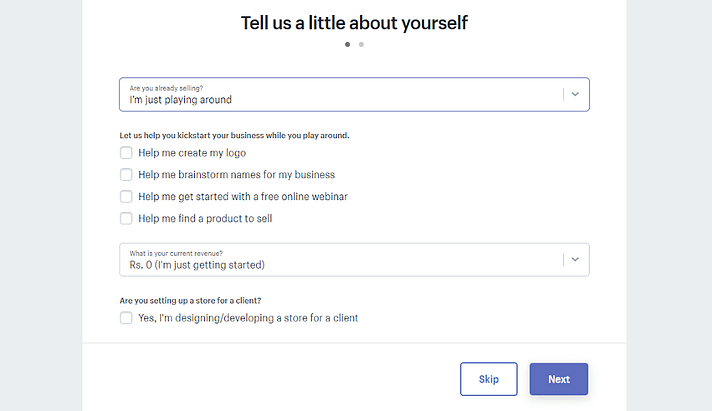
If you’re exploring or experimenting, you can select the option indicating you’re just testing.
You’ll be asked to provide your store name, address, including the zip code.
2. Explore the Shopify admin screen
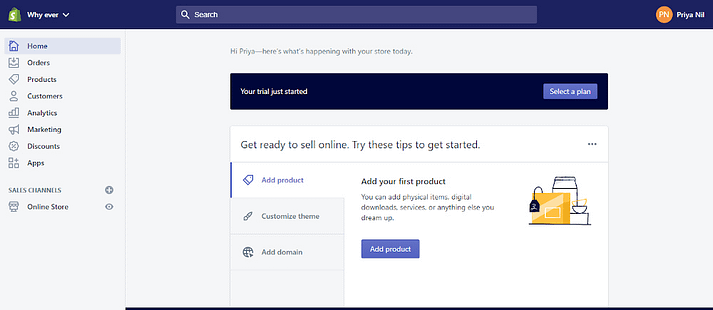
After entering all the details, click on “Enter my store,” and you’ll arrive at your store’s Admin Screen. The majority of actions in this Shopify guide occur on this screen, and here’s a glimpse of what you can expect.
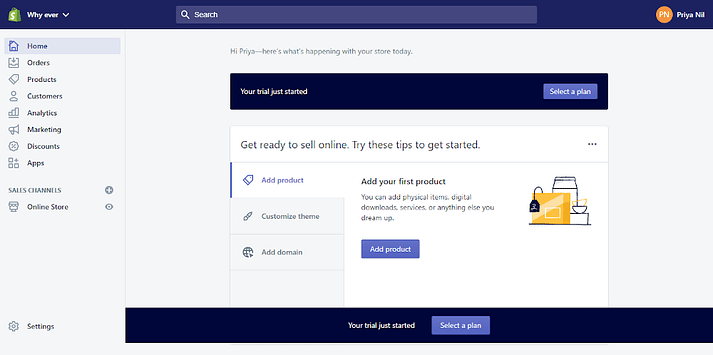
Within this page, you’ll have the capability to add products, configure payments, shipping, and analytics, select your theme, and personalize your store. Although it involves a considerable amount of input and selection, once perfected, it can operate seamlessly over the long haul.
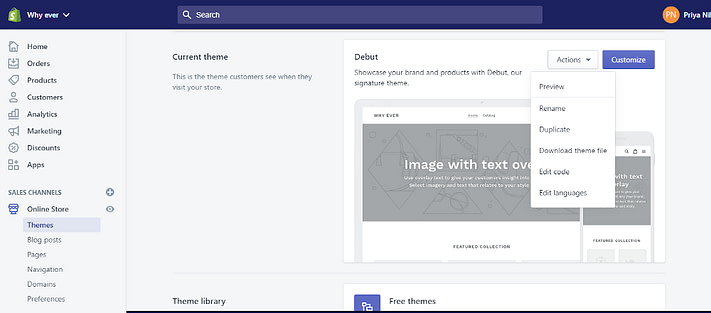
3. Choose and customize your theme
Shopify stores vary in appearance, and Shopify themes play a crucial role in creating a unique and impressive look for your store. Within your admin, the Themes page typically displays a default theme, but you can modify it by choosing from a selection of free or paid themes.
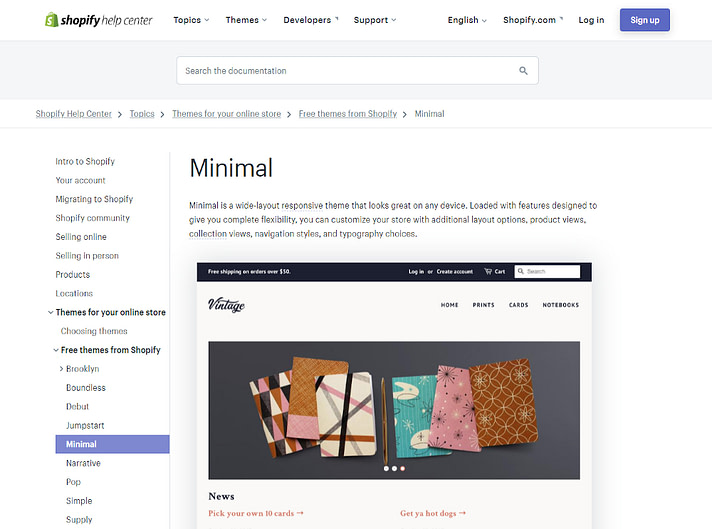
Before settling on a theme, it’s advisable to explore demos, previews, and user reviews to make an informed decision. Navigate to Online Store → Free Theme.
Upon selecting the Add button for the chosen theme, it will be integrated into your store.
You have the option to test and preview alterations and maintain seasonal variations of your active theme. Depending on your chosen Shopify plan, you can incorporate multiple themes into your account. Yet, only one theme can be published simultaneously. I’m opting for “Minimal,” but feel free to select any theme that resonates with you.
These themes encompass all the essentials to create a significant impression. Each theme comes with complete Shopify support, ensuring seamless functionality. Additionally, there are Shopify themes developed by third parties available across various marketplaces and theme houses.
While the theme might already present your store well, you might wish to tailor it further to align with your brand identity. In such instances, numerous customization options are available. Access these options by clicking the Customize button under Themes.
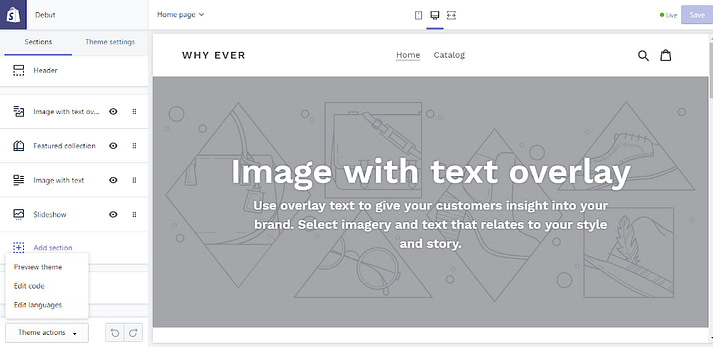
Within this customization interface, you can access your theme’s documentation, modify code, edit text, include free stock photos, upload images, and conduct various other adjustments. For substantial alterations requiring HTML or CSS, especially if coding isn’t your forte, seeking assistance from ‘Shopify Experts’ might be beneficial.
4. Add your products
In this Shopify guide, the subsequent step involves adding the products you plan to sell on your online store. To begin, navigate to Products → All Products → Add Products.
All details related to the products you wish to showcase to your customers are added here. This section allows you to upload product images and fill in various descriptive elements.
Include information that aids customers in easily discovering your products, keeping SEO in mind. Within the Search Engine listing preview, access the Edit website SEO option to input a descriptive title for the link displayed in search engine results. Here, you can incorporate a keyword-rich description, modify the URL, and configure URL redirects.
Beyond these basics, there’s more you can accomplish with Products. You have the ability to duplicate product pages, introduce options to create variants, and further refine details. The bulk editor facilitates making modifications to multiple products simultaneously.
In the Product availability segment, you can designate the channels for selling the products. For enhanced organization and customer navigation, you can tag products under the Organization section. Each product can be assigned up to 250 tags, separated by commas.
5. Configure settings – shipping, payments, etc.
Before launching your store, there are additional settings to configure and activate. Stick with this Shopify tutorial to guide you through these steps. Access all these options from your store’s Settings area.

a) General – This section requires filling in essential business details.
b) Locations – Locations are pivotal in inventory management, order fulfillment, and product sales. They encompass various spots related to inventory, such as retail outlets, warehouses, dropshippers, or inventory-managing apps. The number of locations you can establish correlates with the chosen plan.
c) Shipping – Selecting appropriate delivery methods is crucial before making a sale. Subsequently, customers can choose from these methods during checkout. Shipping zones and rates applicable to the regions and countries you ship to will be visible on the Shipping page within your Shopify Admin.
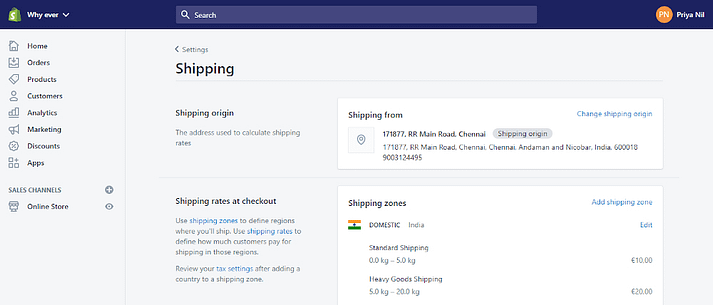
Shopify provides a Shipping service from US and Canadian locations, enabling the purchase of shipping labels displaying rates to customers and expediting delivery. Simply dropping off packages at any post office suffices.
When determining shipping rates, consider actual shipping costs, product weight, and packaging. Buying shipping labels from popular carriers in the USA and Canada via Shopify can potentially slash shipping costs by almost half compared to retail rates.
Surprising shipping rates often lead to cart abandonment. To counter this, consider offering free shipping based on price, weight, or discount codes. Higher-tier plans grant the ability to showcase calculated carrier rates during checkout.
d) Checkout – The secure Shopify checkout processes orders on the checkout page. Adjustments to the checkout page’s appearance and layout can be made in theme settings.
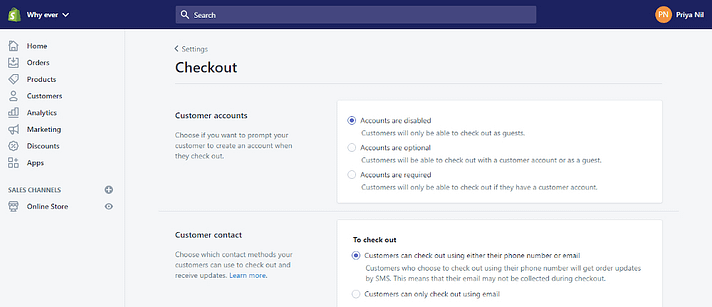
In this section, customers can create accounts to store and pre-fill password-protected details like addresses, emails, and order histories during checkout.
e) Receiving Payments – Shopify allows enabling multiple payment options for customer convenience.
When selecting payment gateways, consider both your and your customers’ locations. Additionally, factor in transaction fees, accepted card types, and offsite/onsite checkout options before choosing your payment provider.
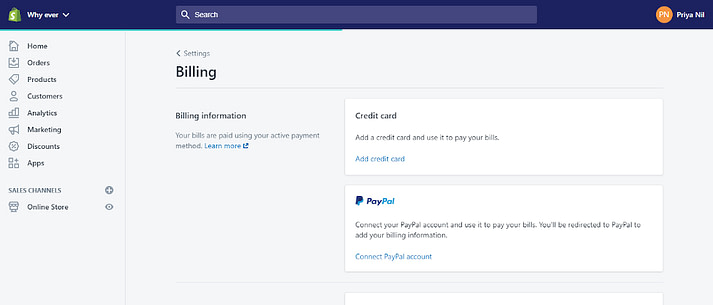
For credit card payments, you can opt for Shopify Payments or select from a roster of 100+ third-party providers.
For non-credit card transactions, alternatives like PayPal, Amazon Pay, or Apple Pay are available, with PayPal as the default payment provider. Accelerated checkout buttons from specific payment providers aid returning shoppers in faster checkouts.
To designate the currency for your store, navigate to Settings → General → Standards and formats → Change formatting.
f) Taxes – Laws in most countries necessitate tax collection on product sales, remitted to the government. Shopify simplifies this process by handling common tax calculations across various jurisdictions. Default rates are utilized, which can be confirmed or adjusted as needed. Additionally, Shopify offers several reports facilitating information compilation for accountants or filing returns with the government.
6. Test your store
To ensure your store functions smoothly before commencing orders, it’s wise to perform a test run. The Bogus gateway serves this purpose, allowing you to verify the checkout process, order processing settings, inventory, shipping, notifications, and taxes.
Here are the steps to activate the Bogus gateway:
1. Go to Settings → Payment providers.
2. Deactivate any enabled payment provider.
3. Click through Accept credit cards → Add a provider → Third-party credit card provider → Provider → Other → Bogus Gateway → Continue → Activate the gateway.
After activation, proceed to your store as a regular customer, place an order, and verify if all settings are correctly configured.
For a more realistic test, genuine transactions using actual credit card numbers can be conducted. However, ensure to cancel the order immediately to avoid transaction fees and promptly receive a refund.
7. Add a custom domain name
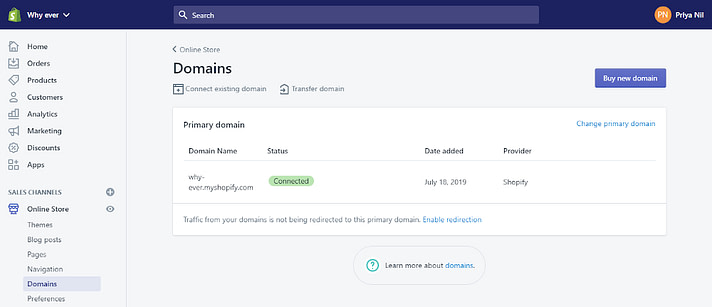
You’re almost ready to launch your store—adding your domain to Shopify is the final step. Similar to any website, having a domain name (your website address) is crucial for visitors and search engines to find you. Shopify offers a solution for this crucial aspect as well.
Initially, Shopify assigns a default domain—www.your-store-name.myshopify.com. However, for enhanced brand recall and better search engine ranking, you might prefer a more customized URL, such as www.your-store-name.com. To achieve this, you can either purchase a domain through Shopify or use a custom domain you already own or buy elsewhere.
Custom domains from Shopify begin at $11 per year, and Shopify seamlessly sets it up for you. Additionally, you retain ownership of the domain, even if you discontinue using the Shopify platform. Although email accounts are not included in the domain package, Shopify offers unlimited mail forwarding to your email address.
If you already possess a custom domain, you have the option to either transfer it to Shopify or connect it to the Shopify platform by following provided instructions.


